Family portraits are a timeless way to capture special moments with loved ones. While indoor photography has its charm, outdoor family portraits provide a great opportunity to incorporate natural lighting, beautiful scenery, and candid moments into your photos. Taking family portraits outside with a tripod can be a great way to achieve a professional look, even if you’re not a professional photographer.
In this guide, we will explore the steps to take to ensure that you capture the perfect family portrait outdoors, from selecting the right location and time of day to setting up your tripod and camera for the best shot. Whether you’re taking family portraits for a special occasion or simply for fun, this guide will help you capture stunning and memorable photographs that you and your loved ones will treasure for years to come.
Preparation
- Choose the location: Select a location that has good natural lighting and a picturesque background. Avoid places with distracting elements or harsh lighting, like direct sunlight.
- Plan the time of day: Plan your photoshoot during the golden hour, which is the hour just after sunrise or just before sunset, when the lighting is soft and warm.
- Coordinate outfits: Coordinate the outfits of your family members to ensure a cohesive and aesthetically pleasing look. Consider choosing colors that complement each other and the location.
- Prepare your equipment: Make sure you have all the necessary equipment, including a camera, tripod, and remote shutter release. Test your equipment before the shoot to ensure that everything is in working order.
- Choose poses: Think about poses and arrangements for your family members. Consider variations in standing, sitting, or even lying down. Use the surroundings and props to create a unique setting.
- Have fun and be flexible: Remember to have fun during the shoot and be flexible with any unexpected changes. Family portraits should be a reflection of your family’s personality and togetherness.
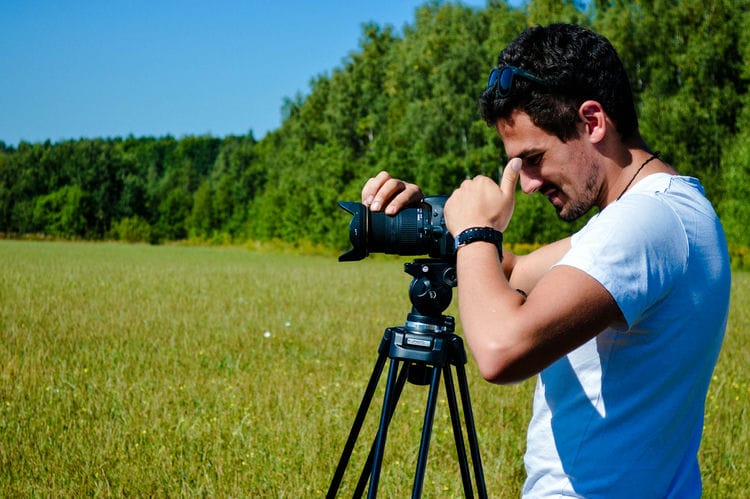
Setting up the Tripod
- Choose a location: Find a spot with good lighting and a nice backdrop. Consider the time of day and the position of the sun to ensure that you’ll have even lighting. Look for a spot that is free of distractions or clutter in the background.
- Position the tripod: Once you’ve found a good spot, set up the tripod. Make sure it’s on level ground and that the legs are extended to a height that’s comfortable for you to work with. You may need to adjust the height of the tripod as you start taking pictures, depending on the composition of your shots.
- Attach the camera: Once the tripod is in place, attach the camera to the tripod head. Make sure it’s securely fastened so that it won’t move or come loose during the shoot.
- Adjust the camera settings: Set the camera to the appropriate shooting mode, such as portrait or landscape, and adjust the exposure settings to get the best possible shot. Take test shots to make sure the settings are working well with the lighting conditions.
- Frame the shot: Use the tripod to help you compose the shot. Consider the rule of thirds, which involves placing the subject(s) off-center for a more interesting composition. You may also need to adjust the height of the tripod or the angle of the camera to get the best framing.
- Use a timer or remote: To take the shot without touching the camera, use a timer or remote. This will help you avoid any shake or movement that could cause blurriness in the image.
- Review and adjust: After taking the first shot, review it to see if any adjustments need to be made. You may need to adjust the exposure settings or the framing to get the best shot. Take multiple shots to ensure you have a good selection to choose from.
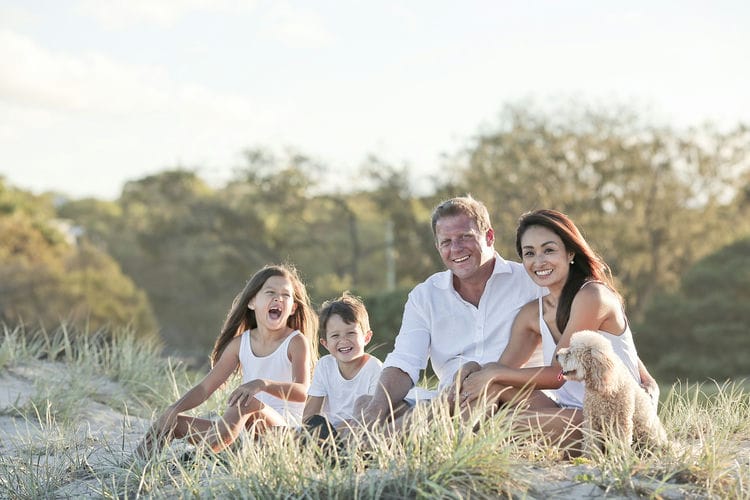
Taking the Photo
Taking family portraits outside with a tripod can be a great way to capture beautiful memories. Here are some tips for taking great photos:
- Choose a good location: Select a location that has good lighting and a nice background. Try to avoid busy or cluttered backgrounds that could be distracting.
- Set up your tripod: Make sure your tripod is stable and level. Adjust the height and angle of the camera so that it frames your subjects nicely.
- Use a timer or remote: Set a timer on your camera or use a remote to take the photo. This will prevent any camera shake that could occur when pressing the button.
- Pose your subjects: Take some time to pose your family members in a way that looks natural and relaxed. Try to avoid stiff, unnatural poses and encourage everyone to interact with each other.
- Check your exposure: Use the camera’s exposure meter to make sure your photo is properly exposed. If the photo is too bright or too dark, adjust your settings accordingly.
- Take multiple shots: Take several photos to ensure that you have at least one good shot with everyone looking their best.
- Edit your photos: Once you have taken your photos, take some time to edit them. Adjust the exposure, contrast, and color as needed to make the photos look their best.
After the Shoot
After the shoot, it’s time to review your photos and edit them if necessary. You can use photo editing software to adjust the exposure, color, and other aspects of the image to enhance the final result. Once you’re happy with your photos, you can print them, share them with your family, or display them in your home.
FAQs
Conclusion
To take family portraits outside with a tripod, you will need a sturdy and adjustable tripod, a camera with a high-resolution sensor and a versatile lens, and a good location with flattering lighting. It is best to take photos during the golden hour, which is the hour after sunrise or the hour before sunset, when the light is soft and warm. When positioning your family members, consider the background, lighting, and composition of the photo. Use autofocus to focus on the subject’s eyes or a specific point, and then switch to manual focus to lock in the focus. Use the camera’s exposure meter to set the exposure for the photo, and make sure everyone is comfortable and engaged to create a natural and relaxed environment.